Create a New Custom User-Facing Doc
Step 1: Access the Dev-Docs menu
Open your development environment and locate the Dev-Docs icon on the left sidebar.
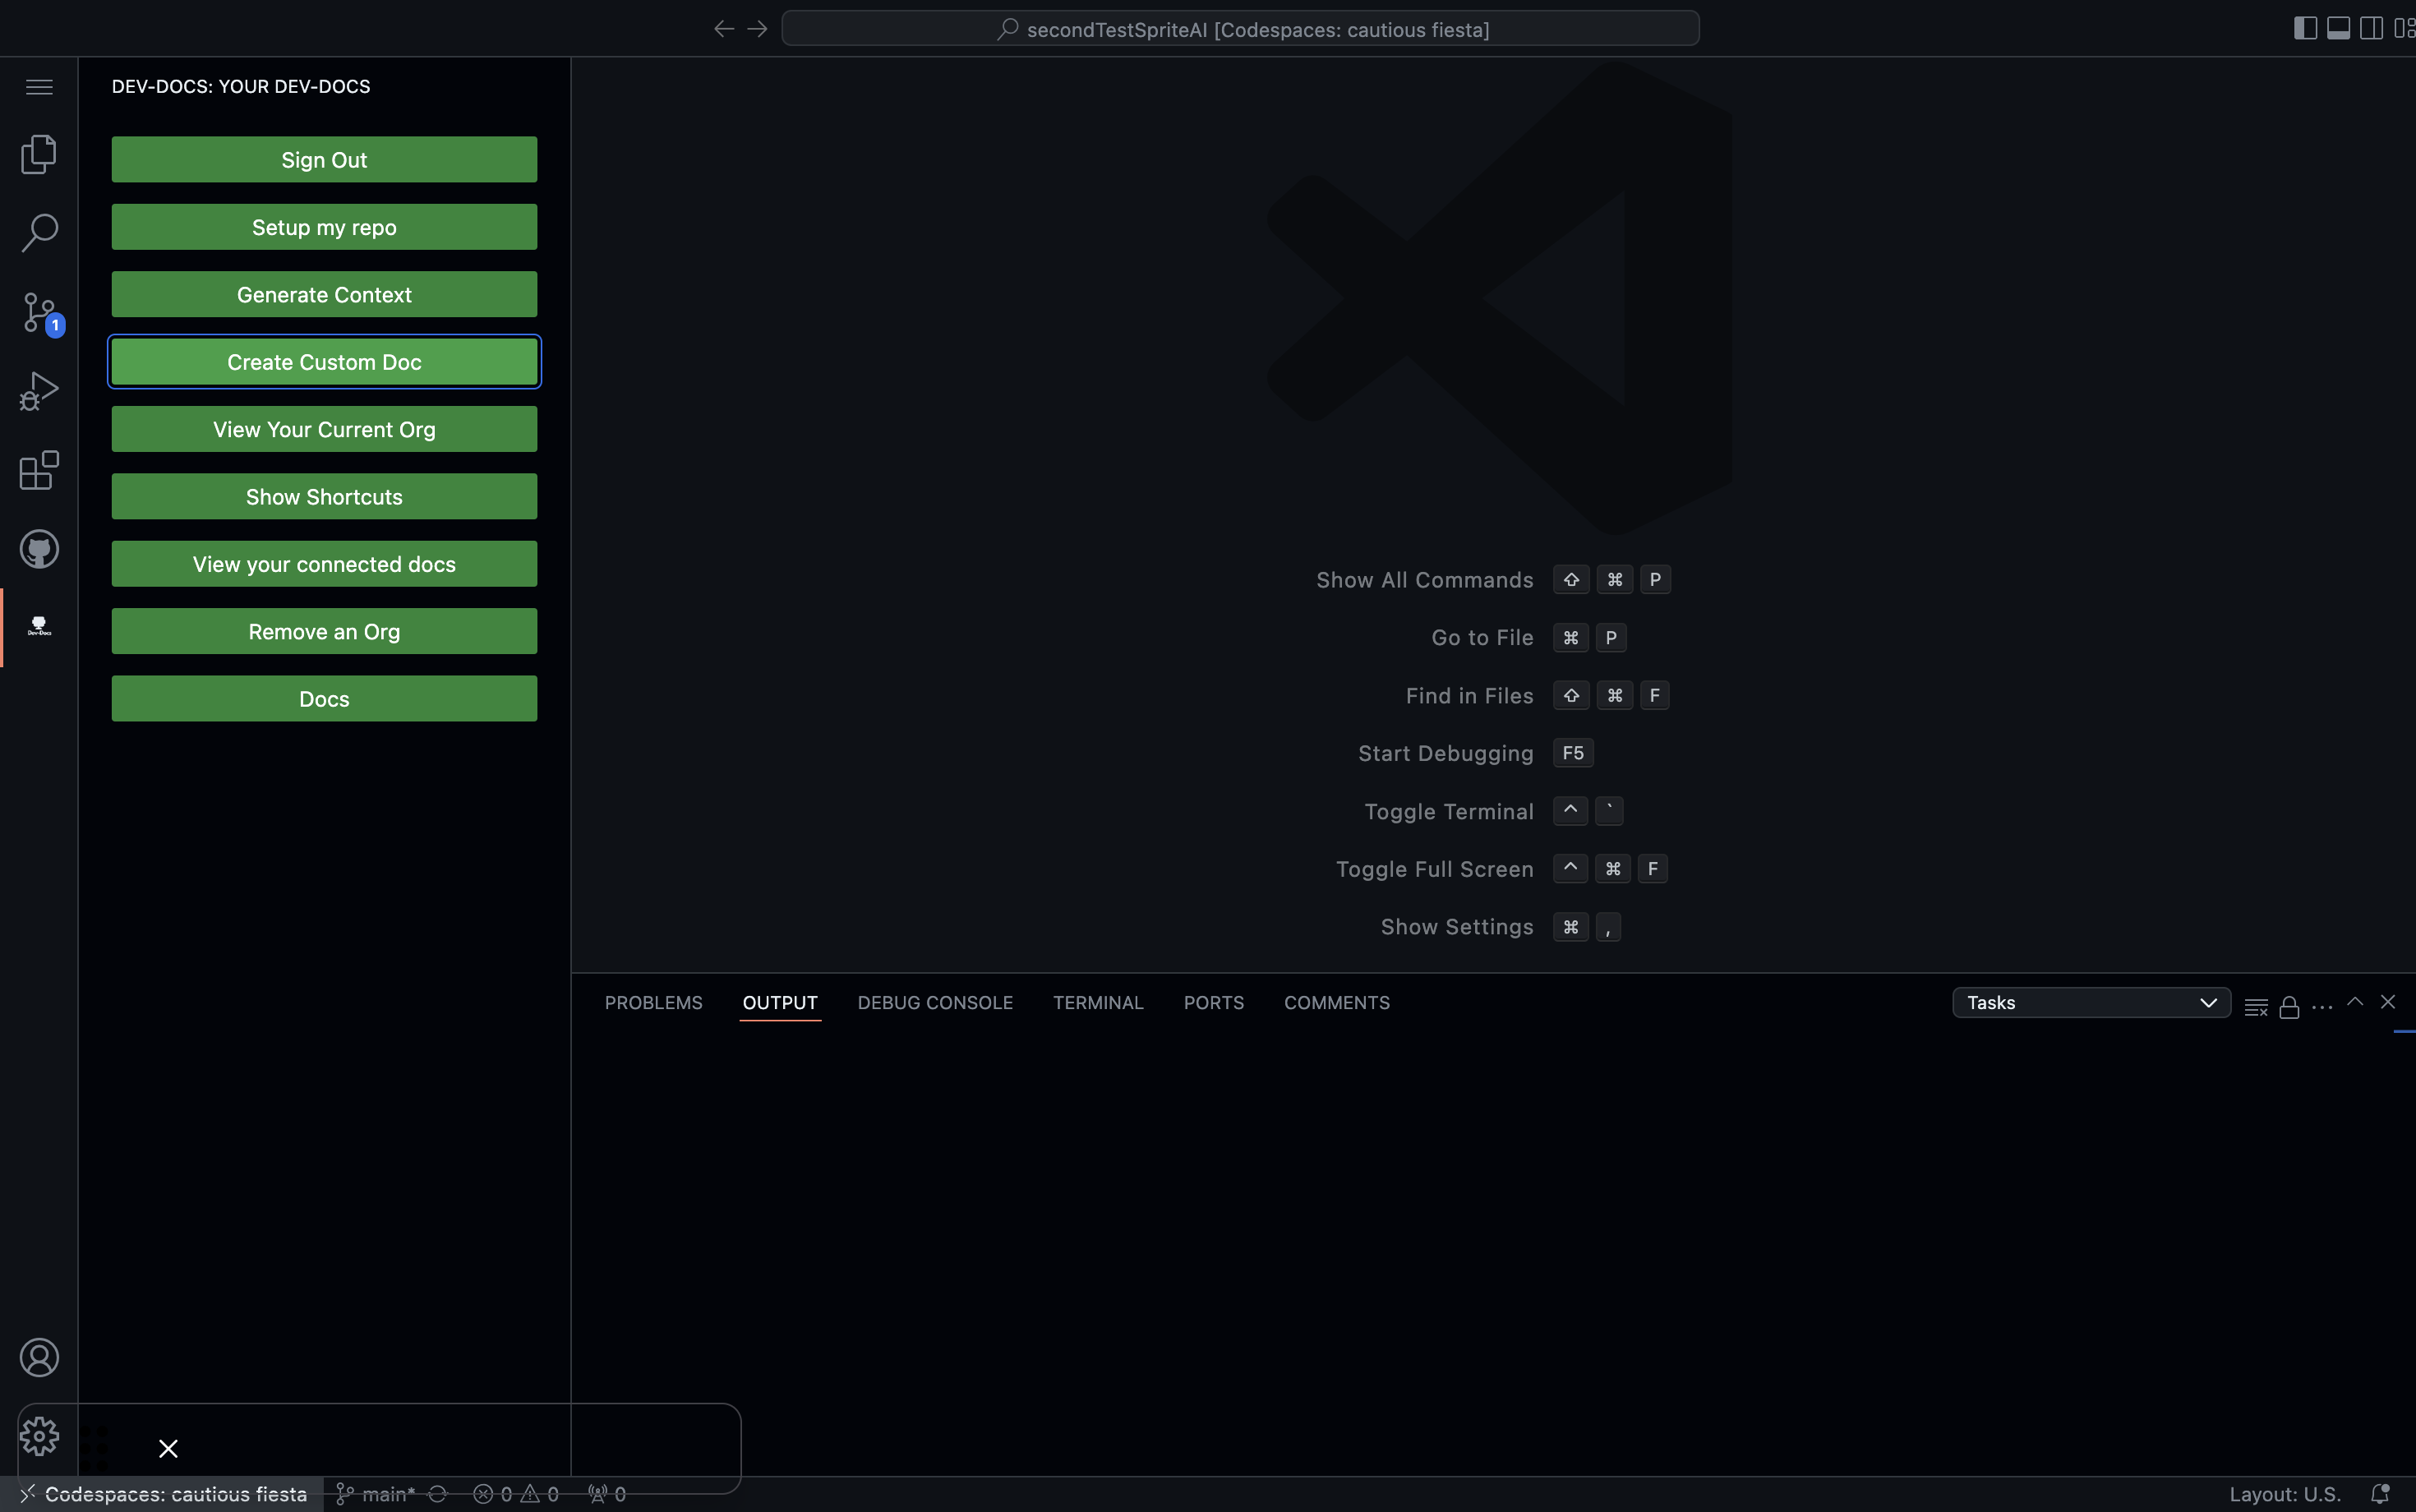
Step 2: Select "Create Custom Doc"
From the Dev-Docs menu, click on the "Create Custom Doc" button.

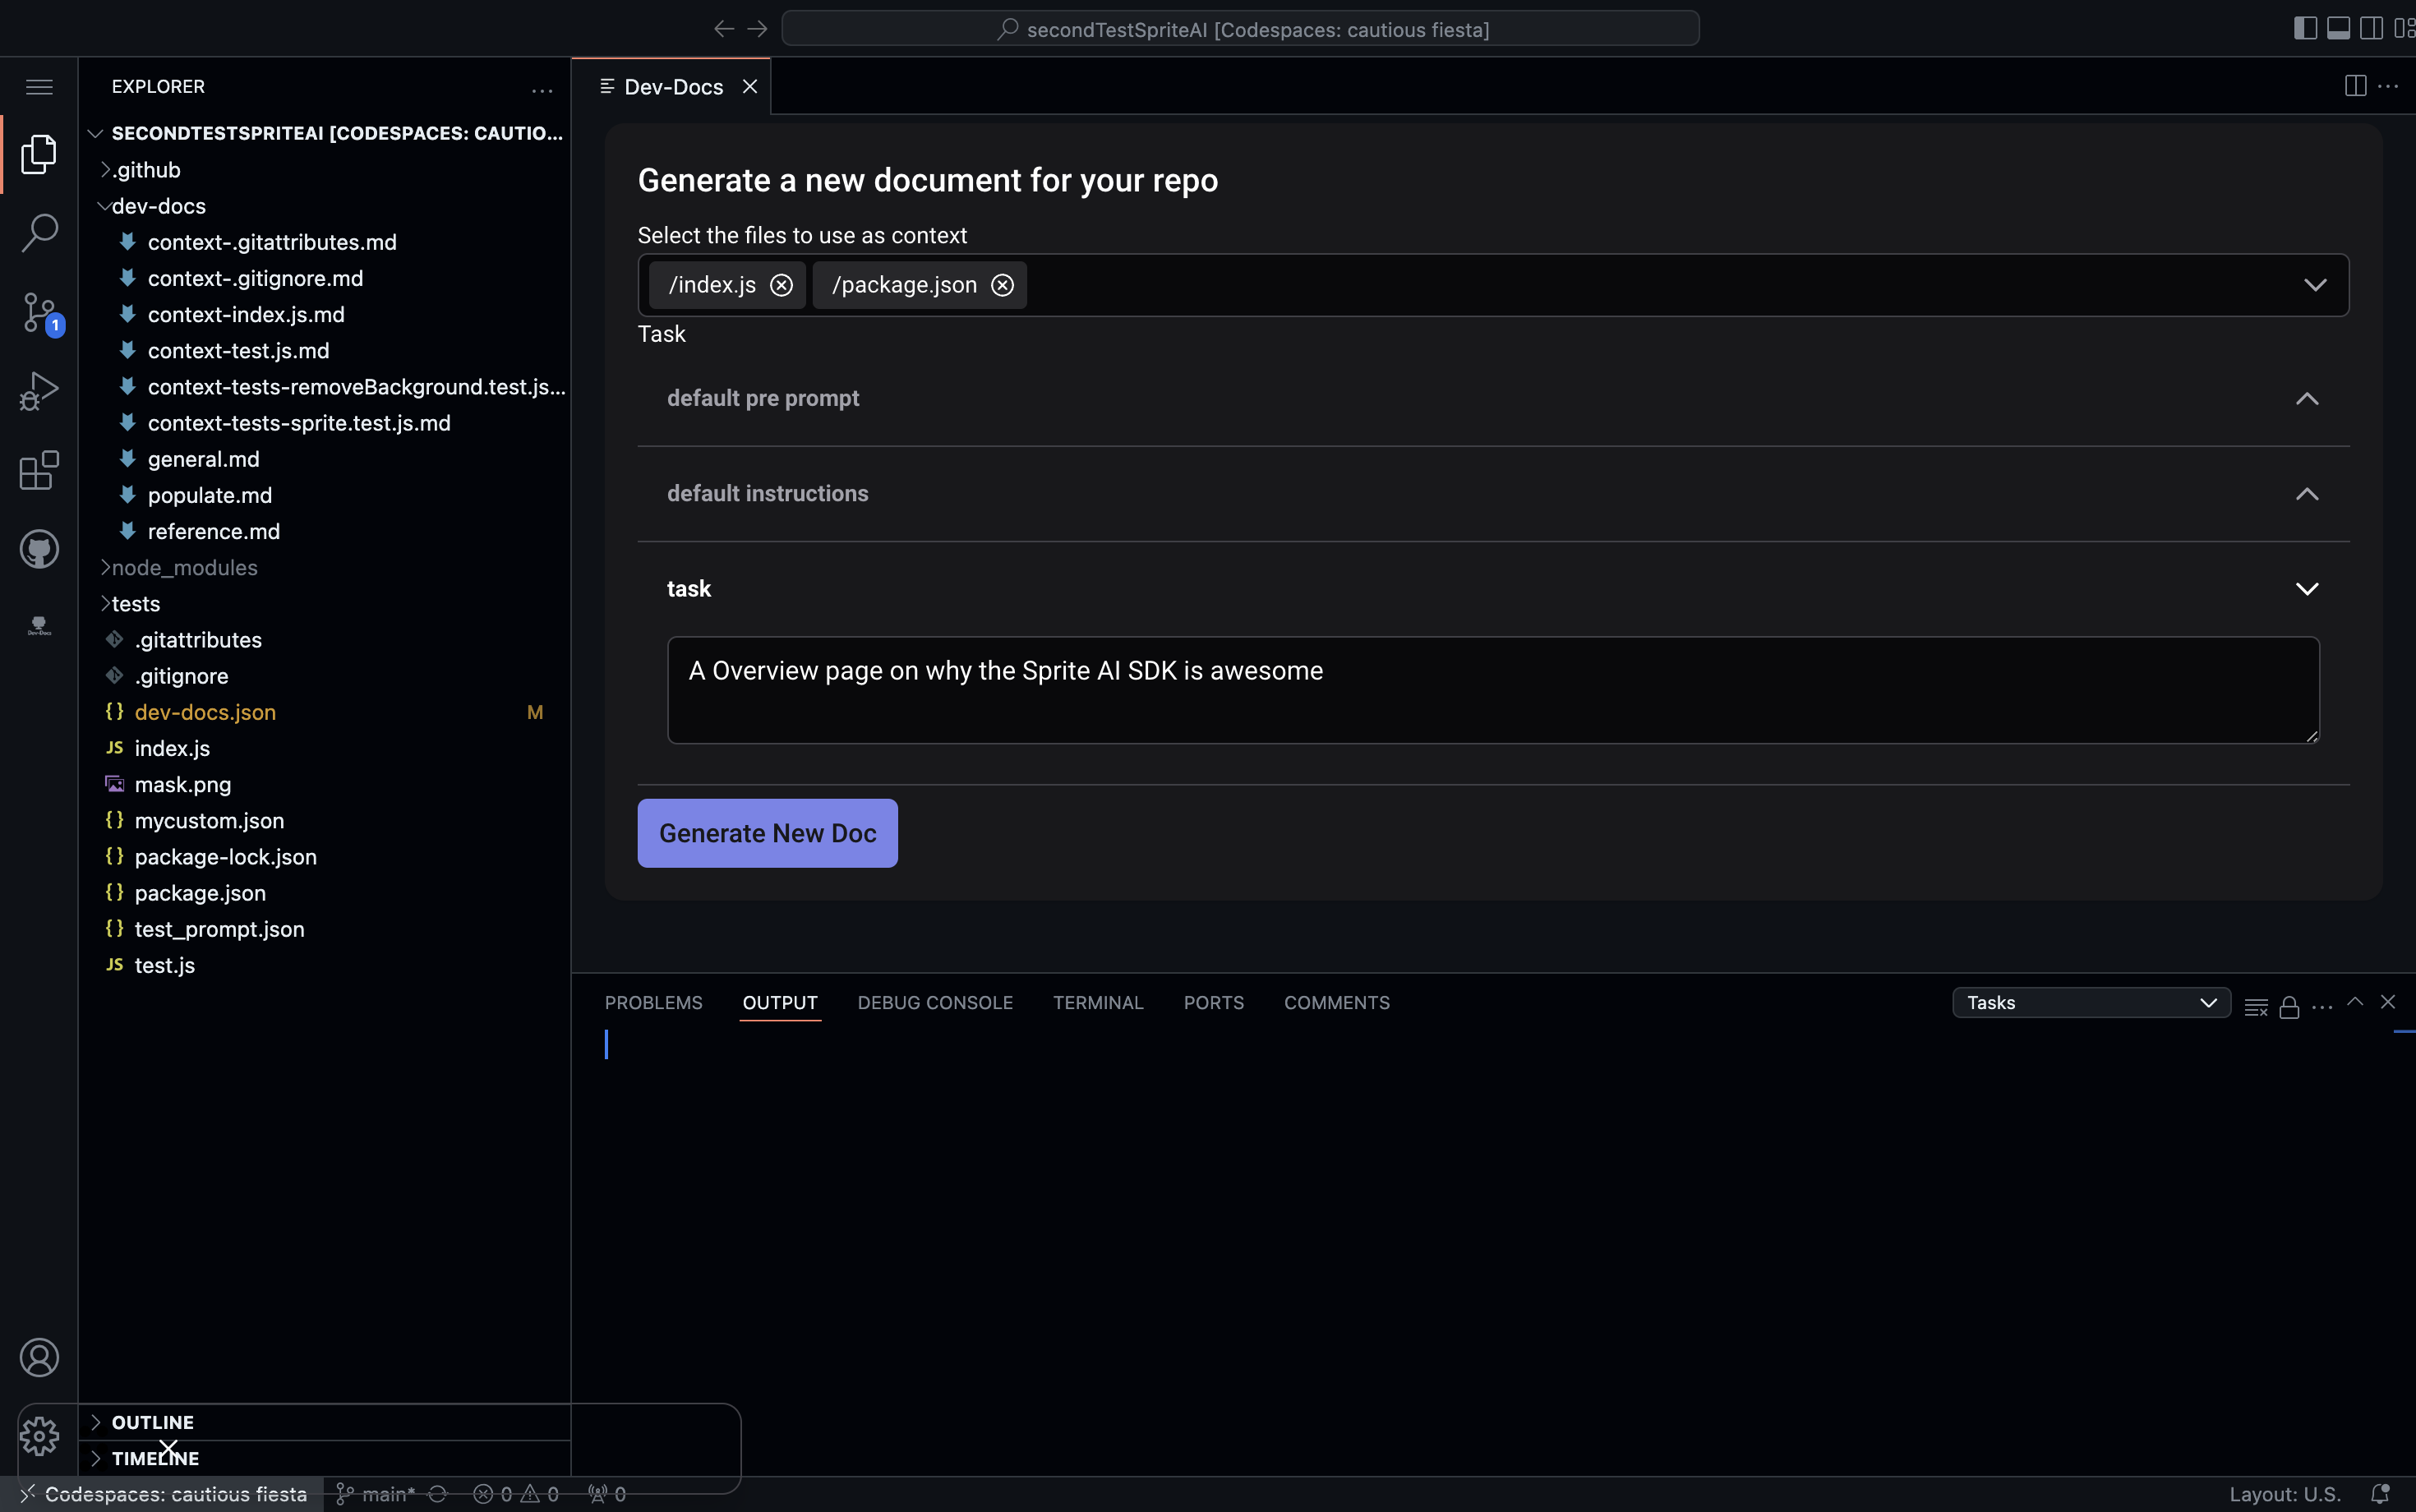
Step 3: Choose context files
In the "Generate a new document for your repo" window, select the files you want to use as context for your new document. In this example, "/index.js" and "/package.json" are selected.
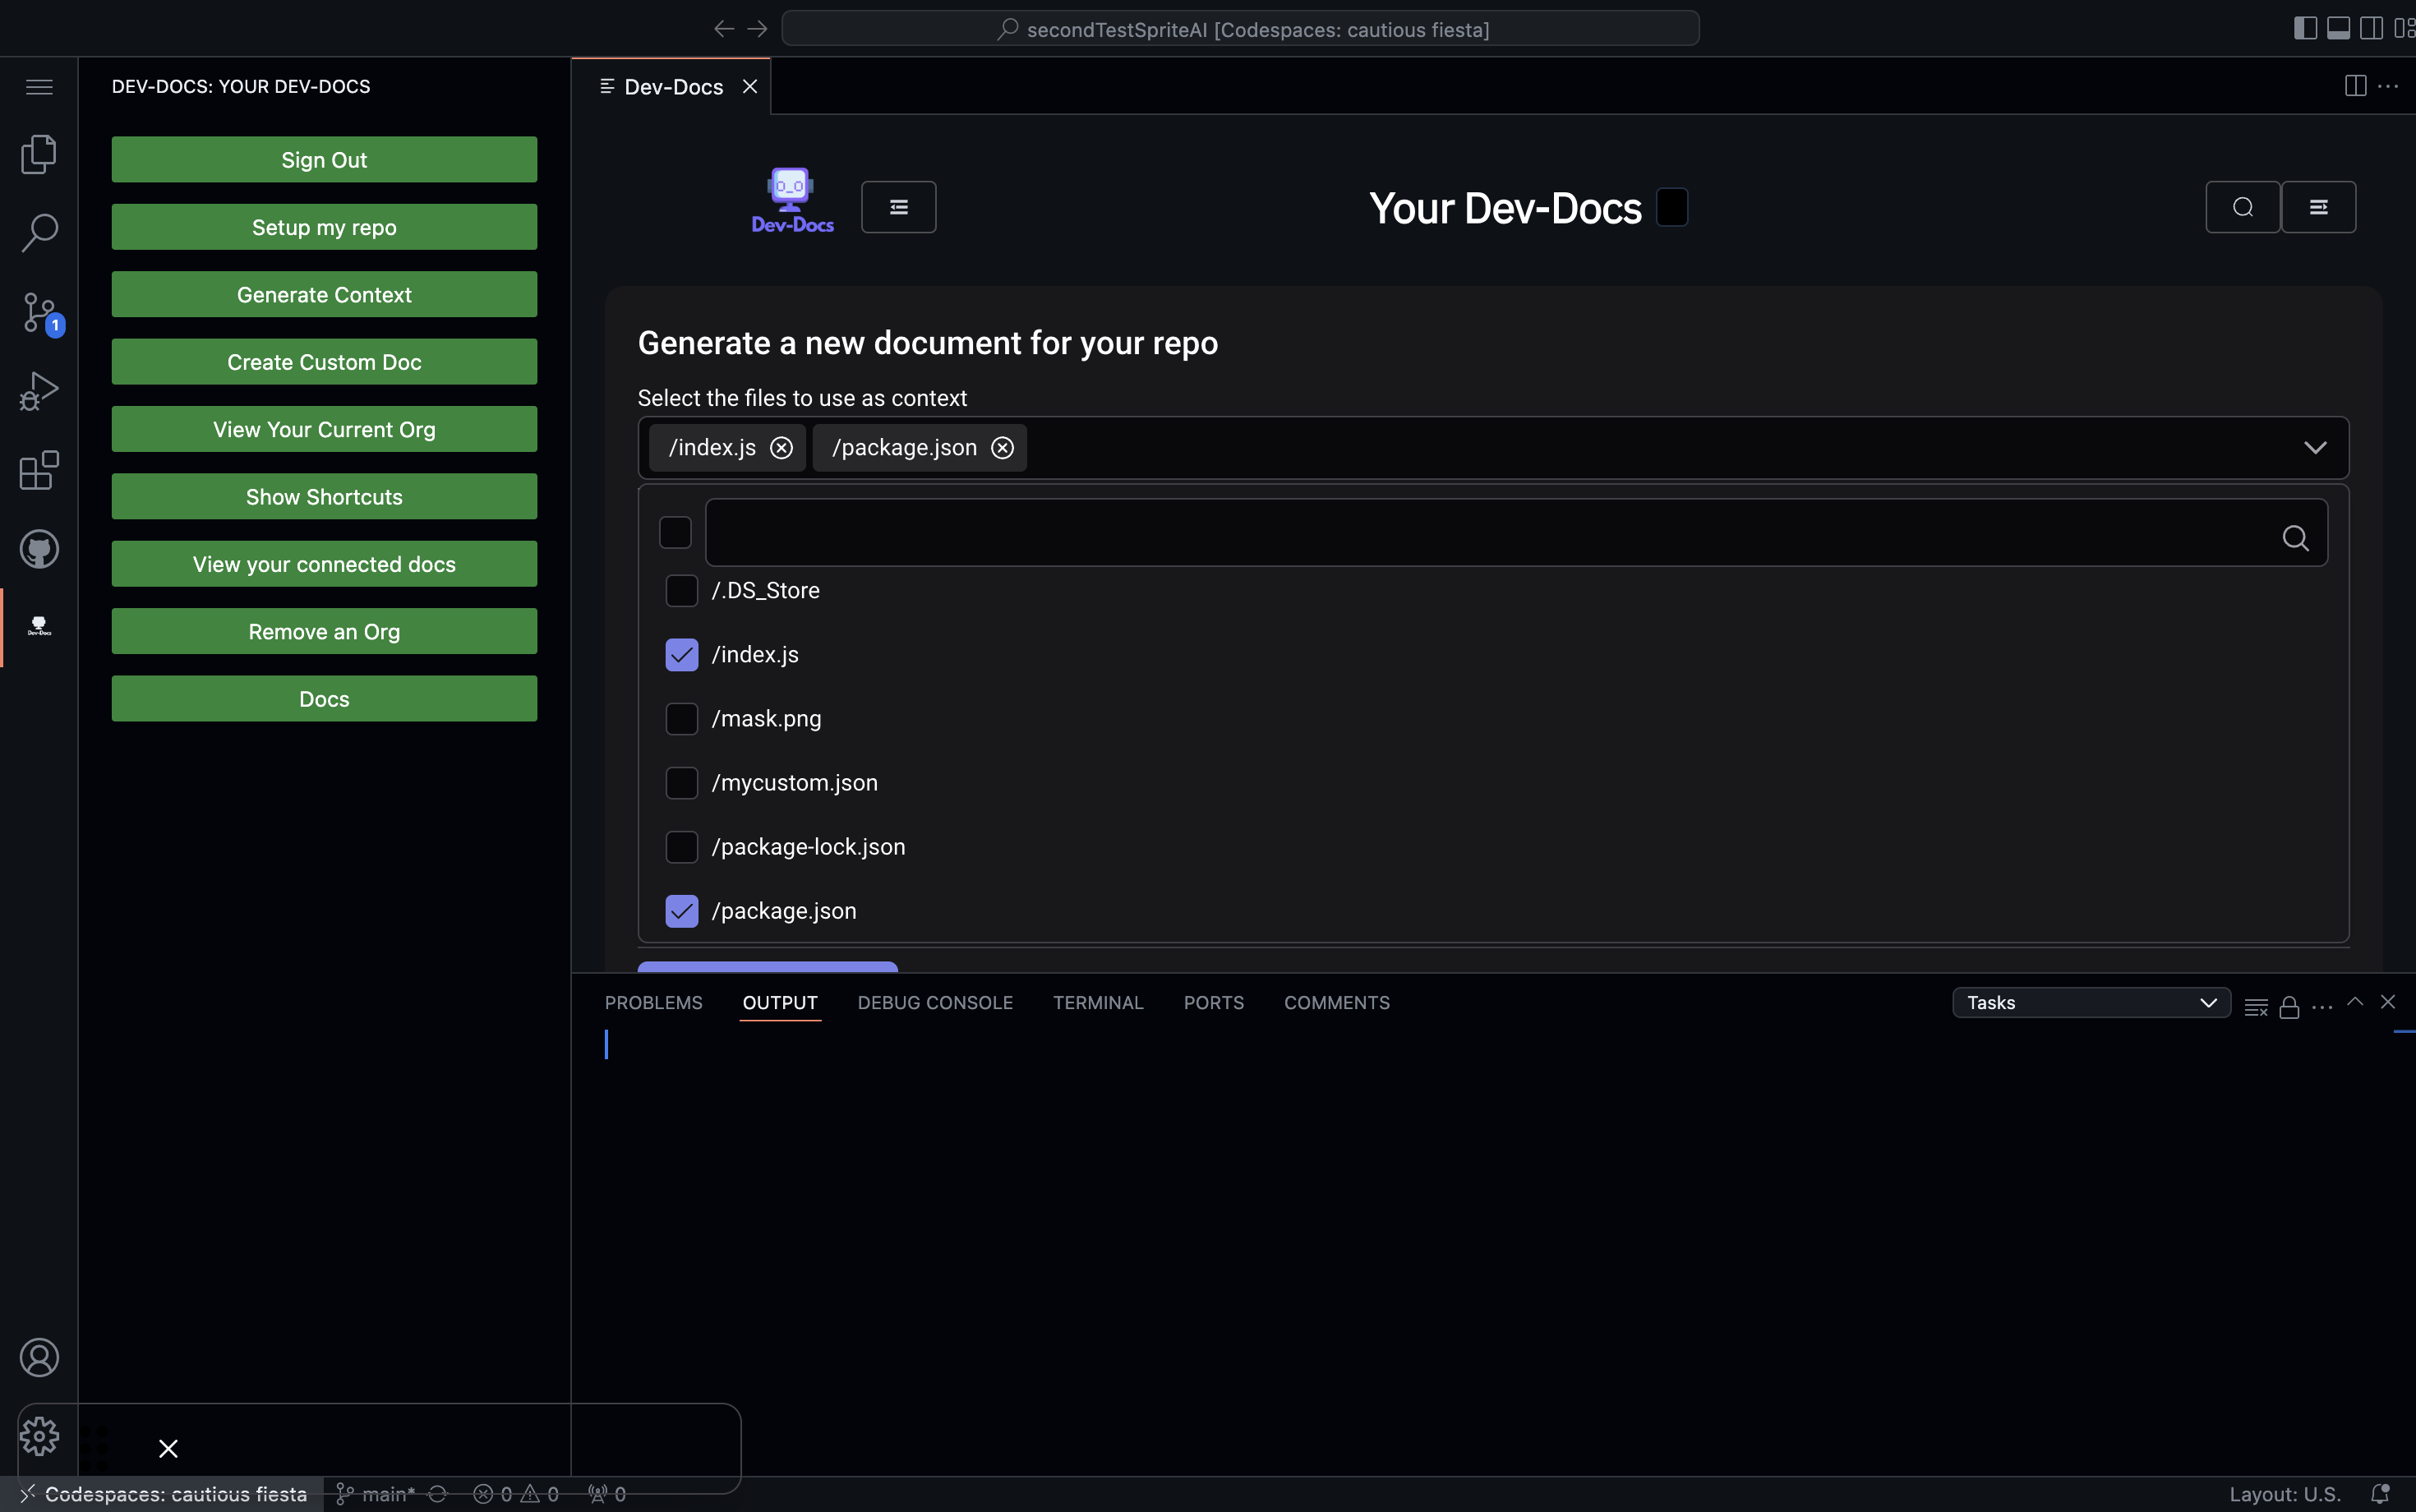
Step 4: Enter the document task
In the "Task" field, enter a description of what you want the document to cover. For this example, we'll use "A Overview page on why the Sprite AI SDK is awesome".
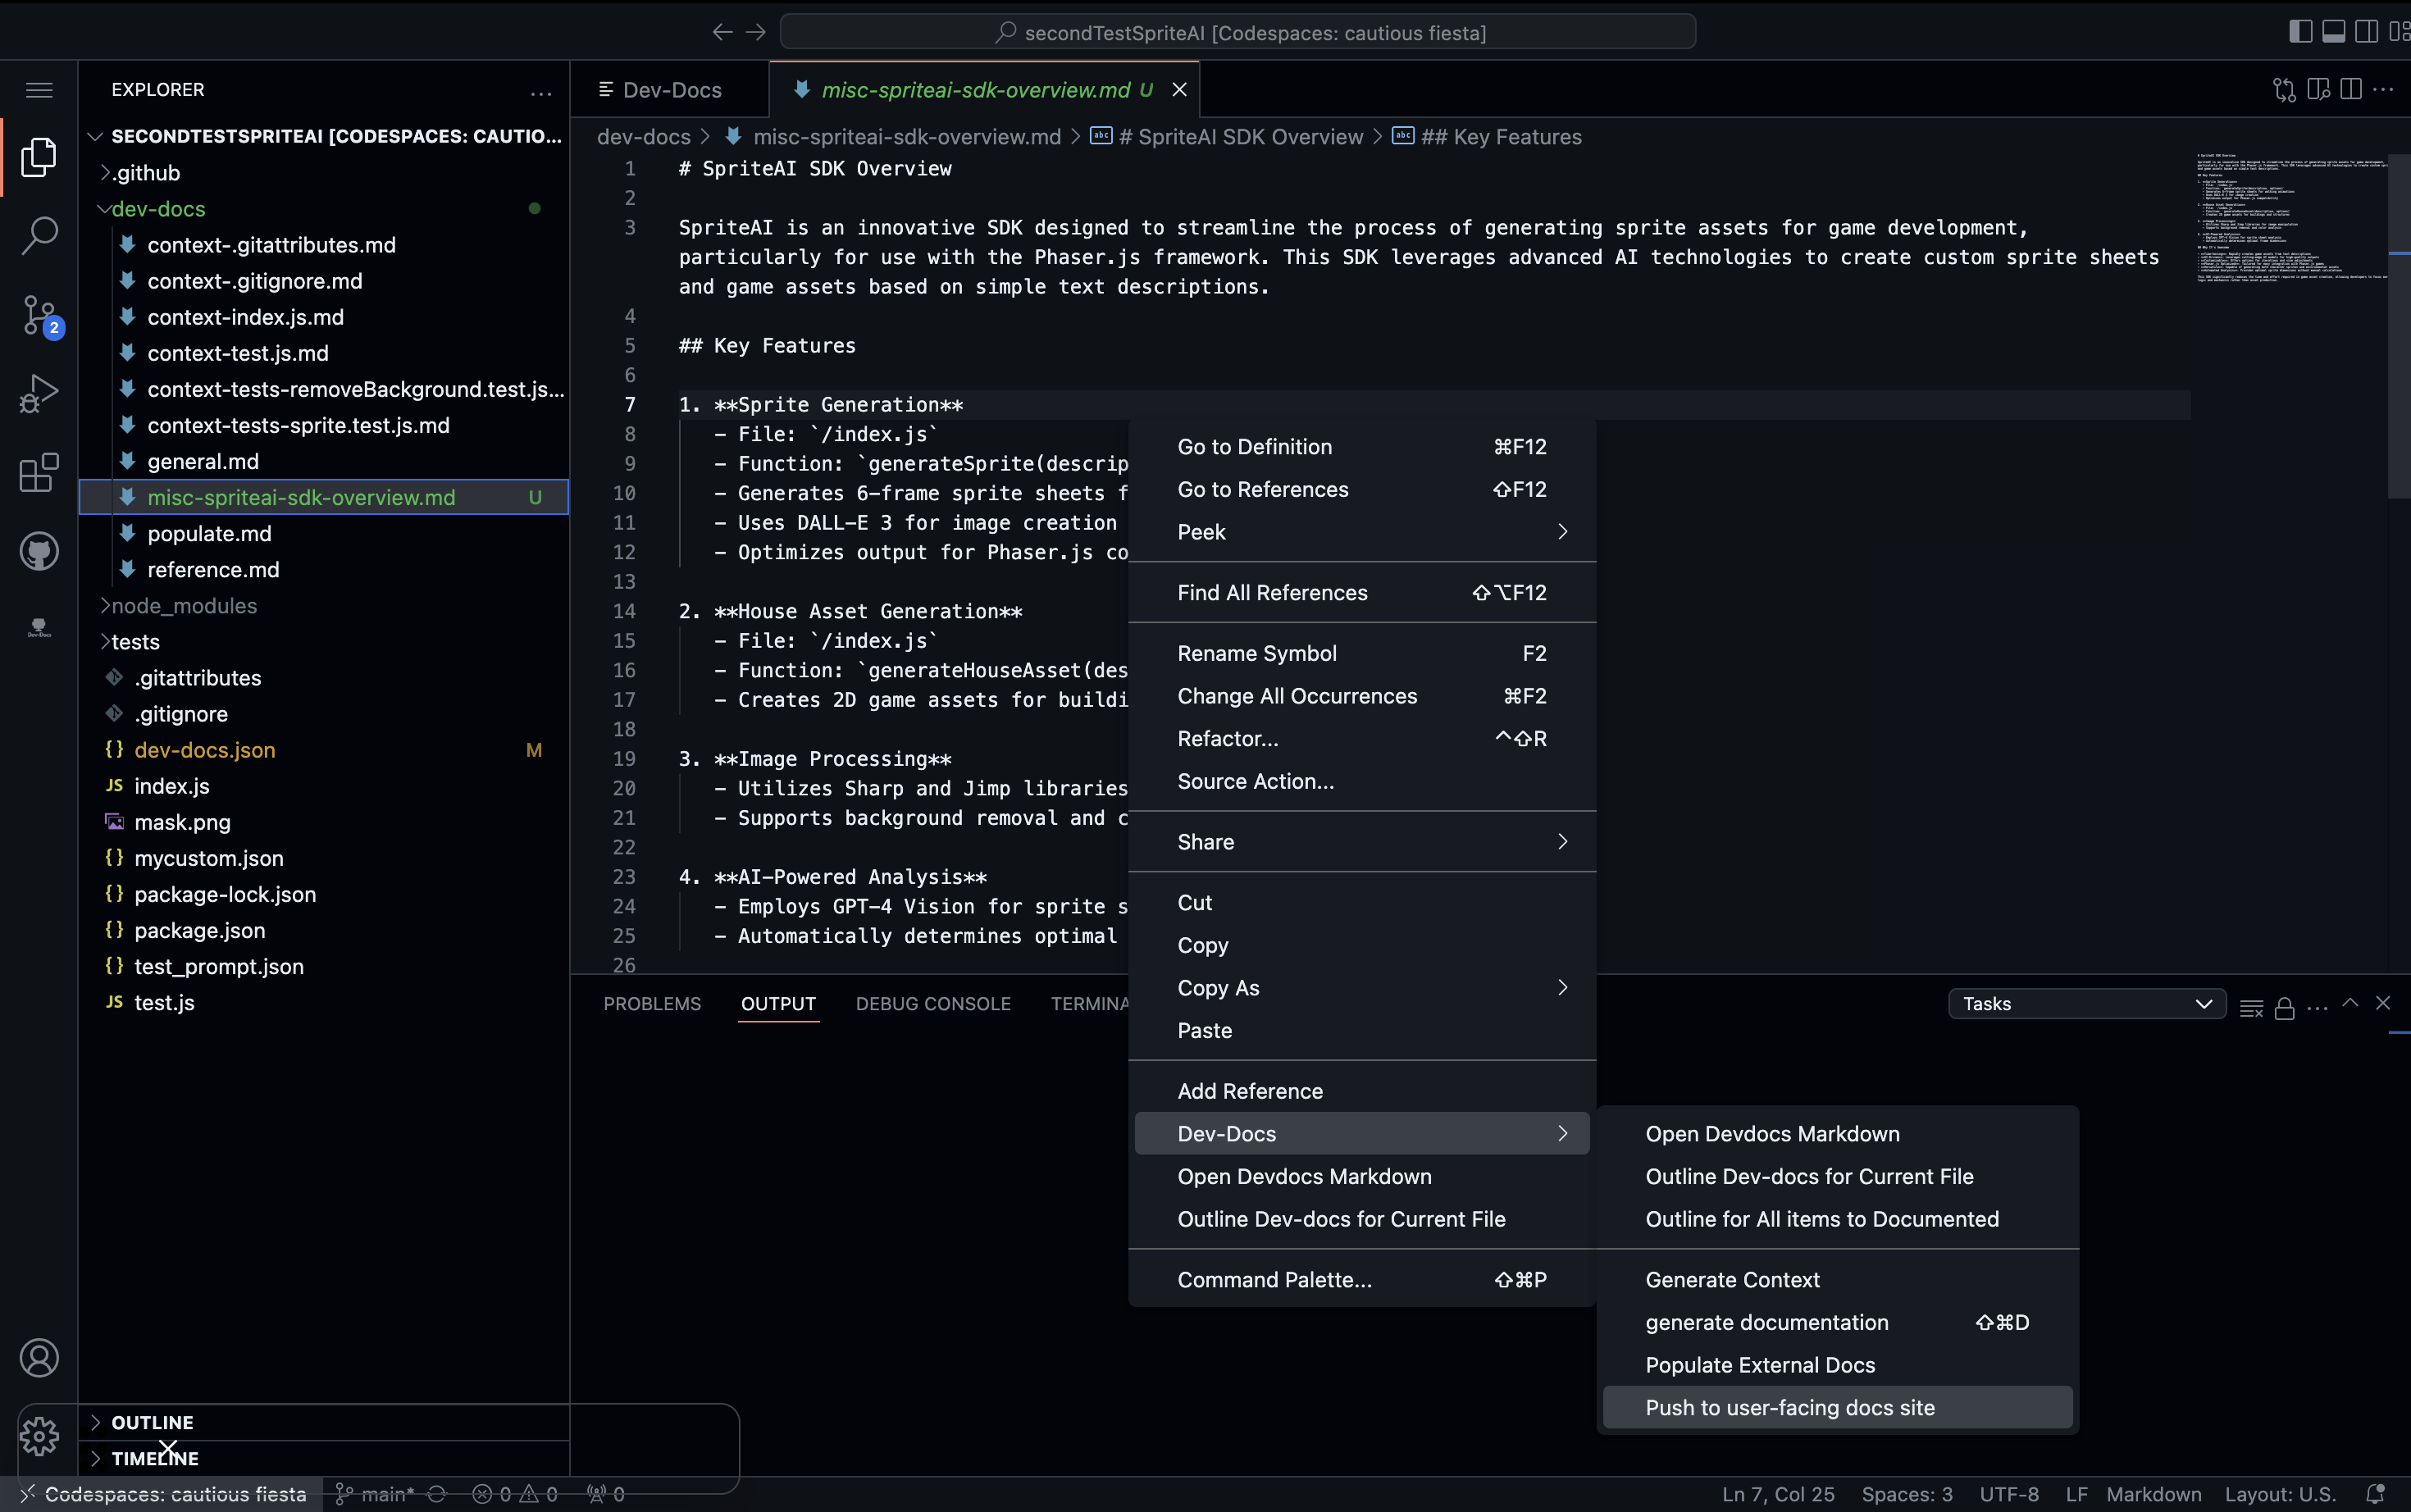
Step 5: Push the markdown doc up
You should now have a new markdown doc for your prompt. Feel free to edit and review as you wish. When you are ready you can now right click the markdown file and from the sub-menu select "push user-facing docs site" to push up your new document.
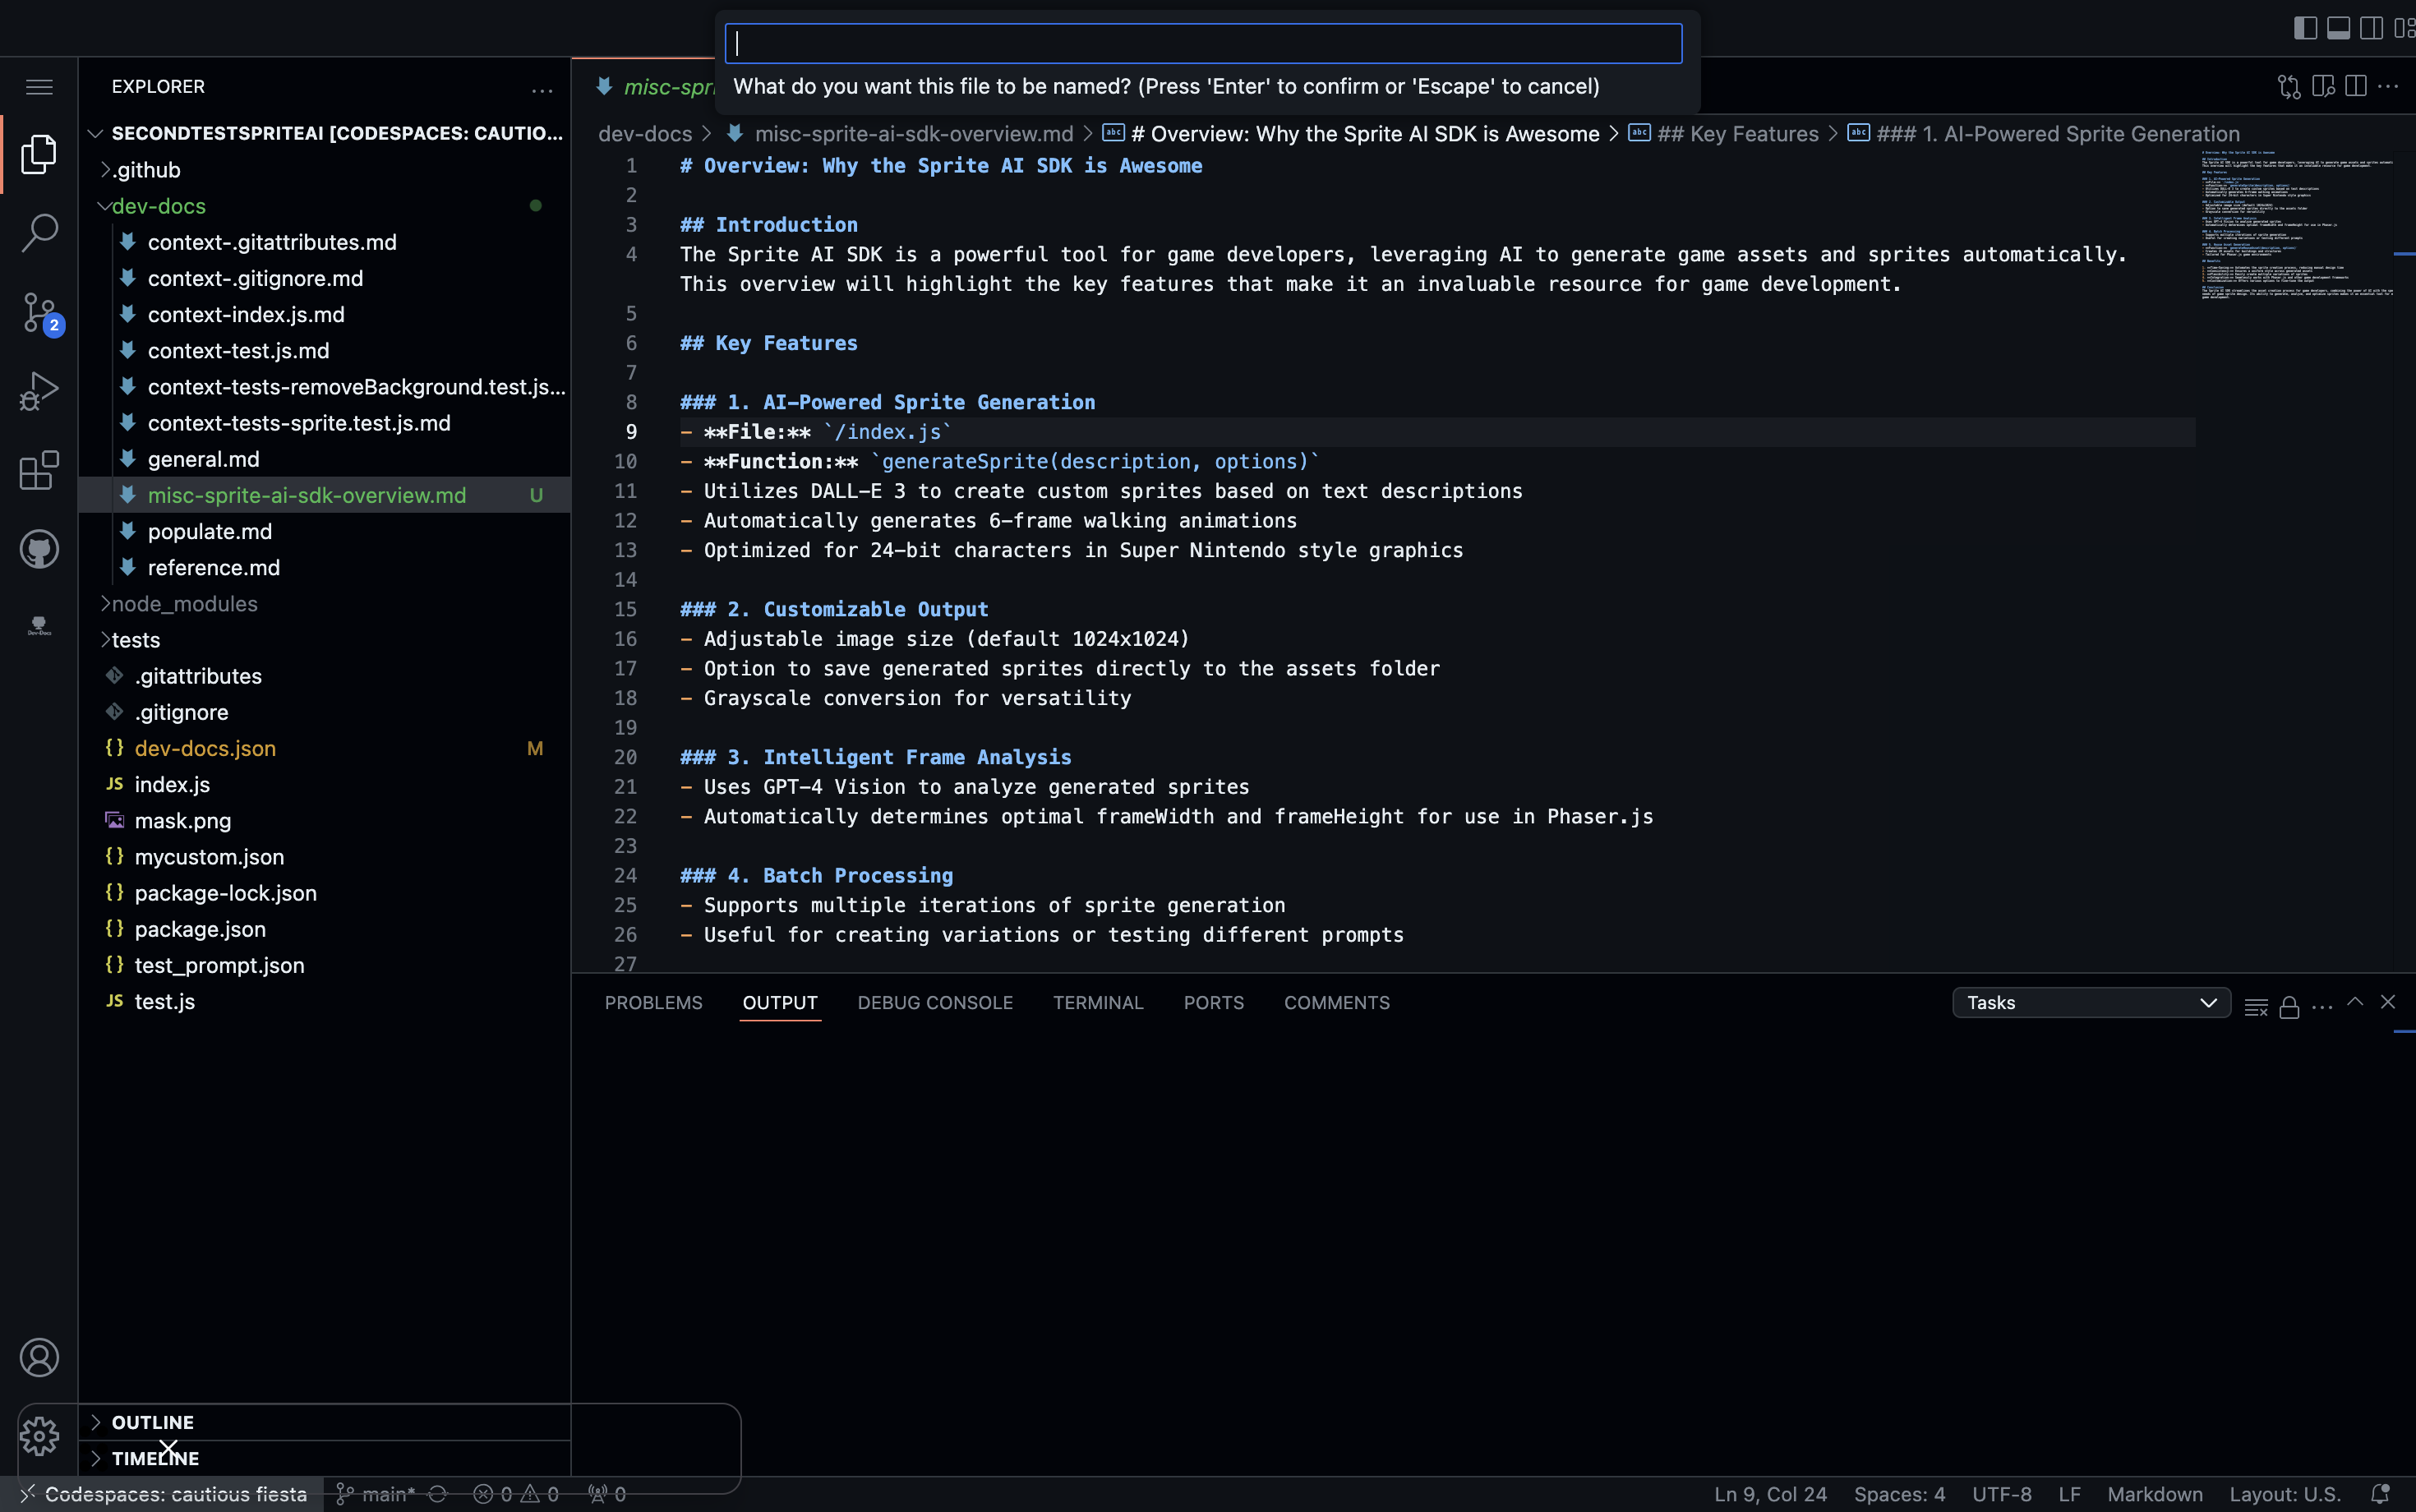
Step 6: Provide a title to the document
Before your document is pushed up, you have to give it a title so when prompted enter a title for the document you are going to pushing up.
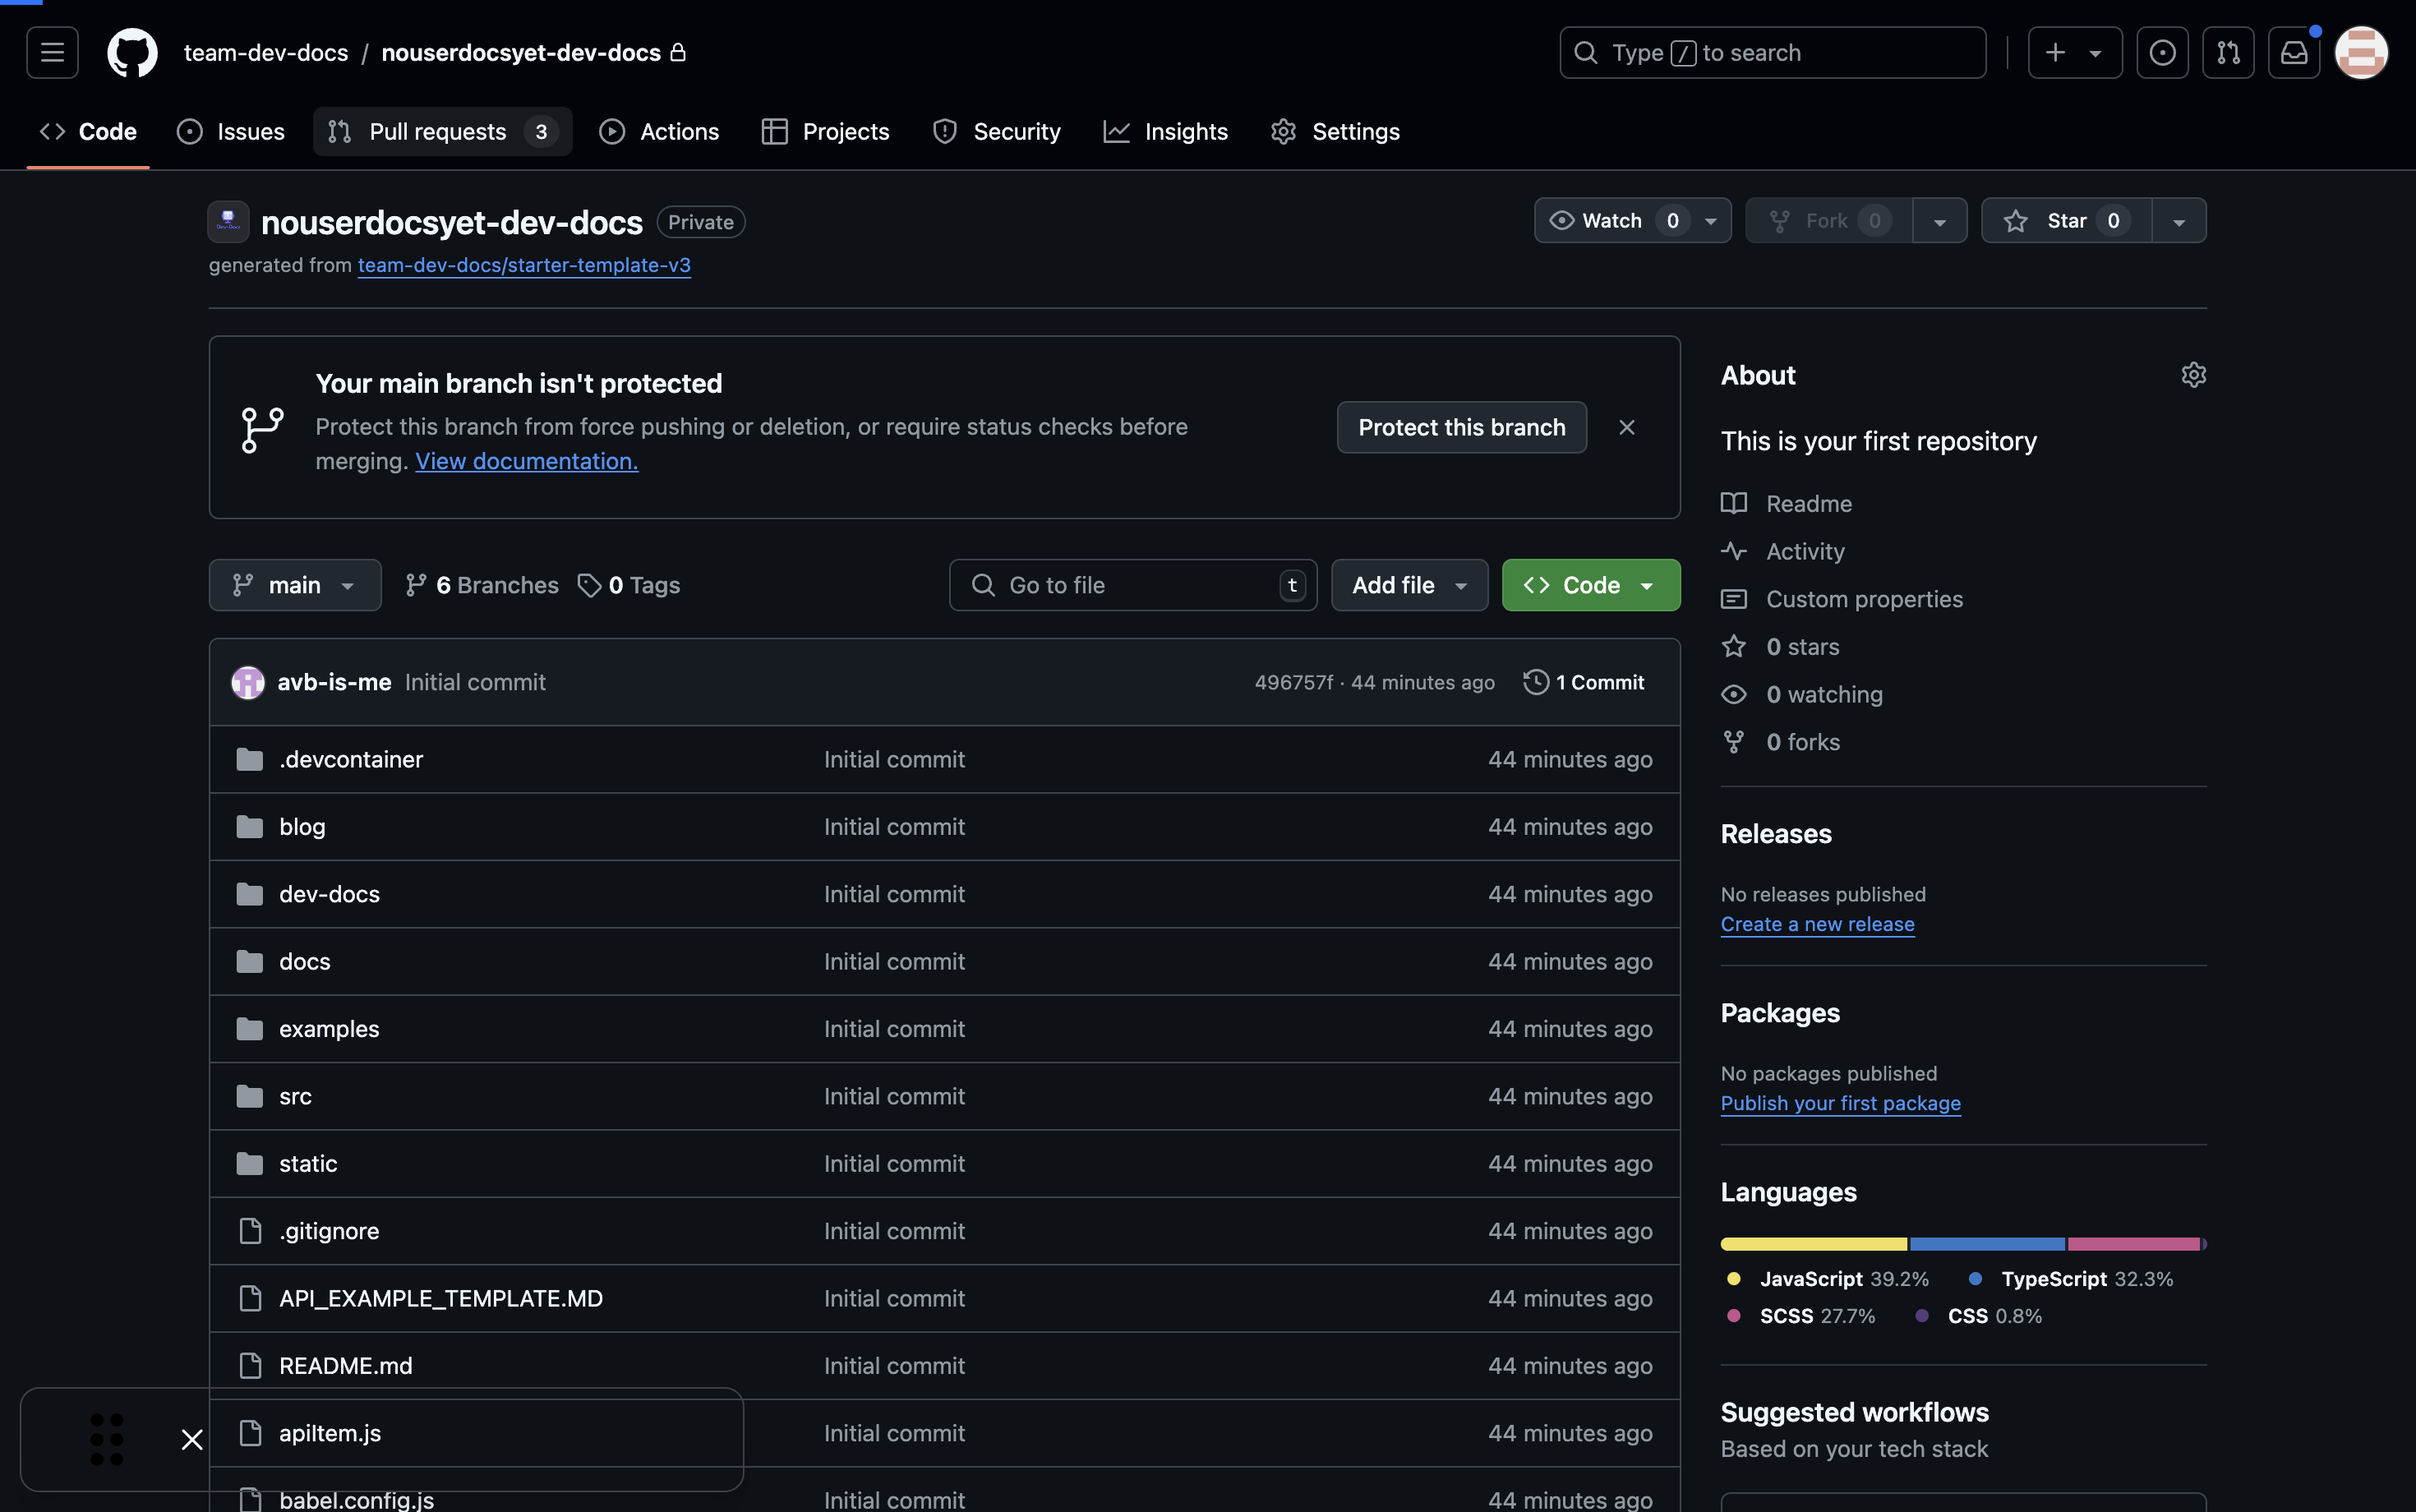
Step 7: View changes to GitHub
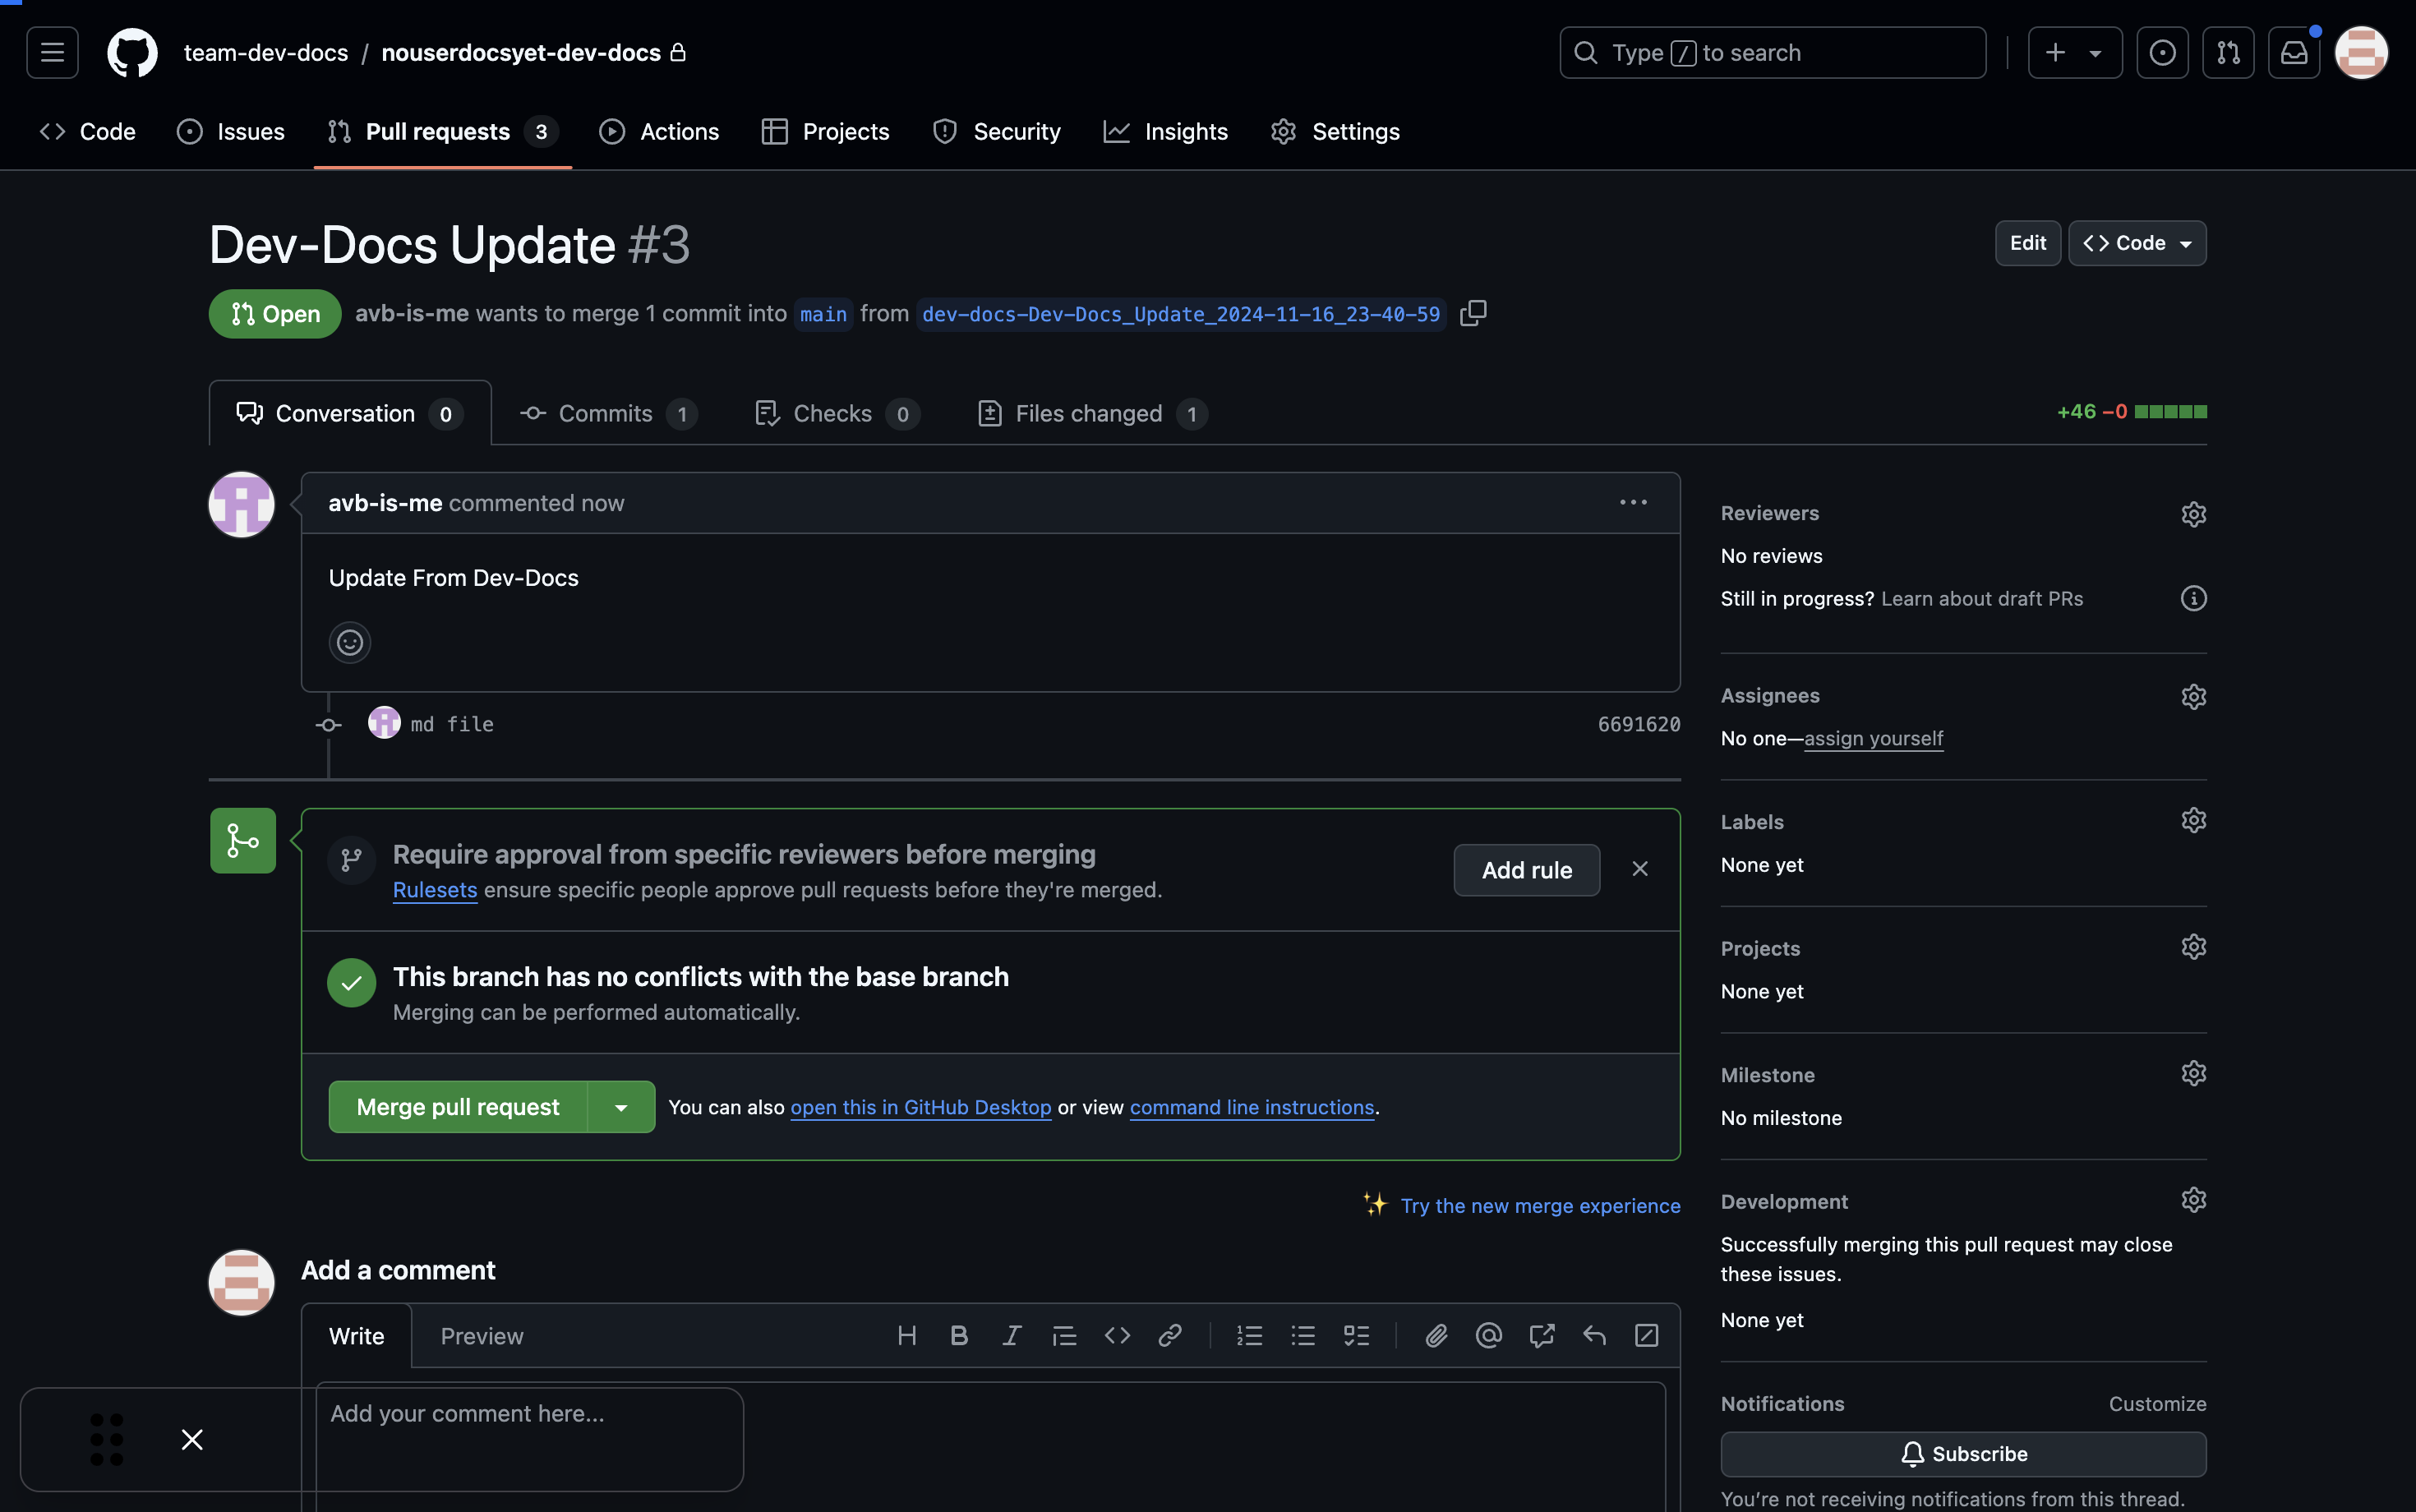
Now visit your connected user-facing docs repo and look for the generated pull-request.
Step 8: Review and merge the pull request
Review the changes in the pull request. If everything looks good, merge the pull request to add your new custom user-facing document to the main branch.
